Quickstart Guide
You've installed Extras for Cliniko - here's how to get it set up. It takes about five minutes, and most features work straight away without any setup at all.
- Subscribe, or log in if you've already paid
- Pin the extension to your toolbar
- Set up your locations
- Mark non-billable appointment types
- Switch features on and off
1. Subscribe, or log in if you've already paid
Extras for Cliniko costs £5 a month per user. Payments are handled by ExtensionPay and Stripe, so your card details never pass through the extension.
New subscribers
- Choose to subscribe, and enter your email address and card details on the payment page.
- Once payment goes through, open or reload Cliniko and the extras appear.
Already paid?
If you've subscribed before - on another computer, in another browser, or before reinstalling - you don't need to pay again.
- Choose to log in, and enter the email address you subscribed with.
- Click the link in your email.
- Reload Cliniko.
2. Pin the extension to your toolbar
The toolbar button is where you subscribe, change settings and switch features on or off, so it's worth keeping it visible.
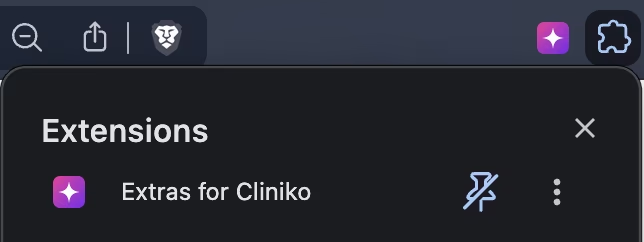
Chrome
- Click the puzzle piece icon to the right of the address bar.
- Find Extras for Cliniko in the list and click the pin icon next to it.
Firefox
- Click the puzzle piece (Extensions) icon to the right of the address bar.
- Click the gear icon next to Extras for Cliniko and choose "Pin to Toolbar".
3. Set up your locations
Locations tell the extension where each appointment happens, so it can estimate travel time between home visits on the diary. If you only work from one clinic, you can skip this step.
- Open the extension's menu and go to Appointment Types & Locations → Set up....
- Add each place you start from or work at - for example your clinic, or your home if you set off from there - with a name and a UK postcode.
- For each appointment type, choose where it takes place: at one of your locations, or at the patient's home for home visits.
- Open the diary in Cliniko. Estimated travel times appear between appointments in different places.
Travel estimates use postcodes only - no names or other patient details. If your practice would rather not send postcodes to postcodes.io, switch off "Travel time between visits". See the privacy policy for details.
4. Mark non-billable appointment types
The billable hours panel on the diary shows how much of your day earns money. For it to be accurate, tell the extension which appointment types are not billable - lunch bookings, team meetings, CPD or phone calls might be non-billable items for your practice.
- Open the extension's menu and go to Appointment Types & Locations → Set up....
- Mark each appointment type you don't charge for as non-billable.
- Open the diary. The billable hours panel now counts only the billable appointments, and one click highlights them.
If you add a new appointment type in Cliniko later, come back and mark it here too.
5. Switch features on and off
Every feature can be switched on or off from the extension's menu, so you can keep only the ones relevant to your practice.
- Click the Extras for Cliniko button in the toolbar.
- Features are grouped by where they appear in Cliniko - the diary, patient pages and so on. Use the switch next to each one to turn it on or off.
- Reload your Cliniko tab if a change doesn't show straight away.
Need a hand?
Questions, bugs or feature requests: hello@wanderingdeveloper.com. Let us know if there's a feature missing that would help you work more efficiently and effectively.
Extras for Cliniko is an independent product. It is not affiliated with, endorsed by or supported by Cliniko or Red Guava.